Building a Southern Pine Deck
Building a
Southern Pine Deck
A deck is a structure made up of many components — including footings, posts, beams, bracing, joists, decking, ledgers, rim boards, guard posts, rails, and stairs — all of which are required to be properly connected together.
Whether you are a contractor or do-it-yourselfer, a deck’s safety, appearance, and long-term performance depends upon the proper design, selection, installation, and periodic inspection of all components and their connections.
TIP: Support posts can be notched within limits to accommodate bearing for the beam. However, notching may expose untreated wood to decay. Notching also reduces the post cross section, thus reducing strength. To avoid notching, use a post cap connector to attach the beam directly on top of the post. Notching is prohibited in areas subject to high winds or seismic activity.
Footings and Posts
Footings transfer loads from the deck framing to the ground and should be securely anchored to resist uplift. Posts support the beams and transfer deck loads to the footings.
Deck posts are generally solid-sawn timbers but may also be glued-laminated or structural composite lumber. The International Residential Code, Section R407.3 specifies a minimum 4×4 (nominal) wood column size. The Prescriptive Residential Wood Deck Construction Guide, however, requires a 6×6 (nominal) post size for residential decks.
A 6×6 post is conservative for most deck applications, allows a deck height of up to 14 feet, and provides adequate bearing for beams. It’s worth noting that diagonal bracing is required for decks that are more than two feet above grade.
| Southern Pine | Code Minimum | Superior Performance |
|---|---|---|
| Selection | 4×4 Southern Pine No. 2 | 6×6 Southern Pine No. 1 Glued-laminated timber or structural composite lumber to size |
| Installation | Decks more than 2 feet above grade require diagonal bracing | Posts with higher load capacities carry heavier loads and provide added stability |
| Durability | Pressure-treated for ground contact use | Pressure-treated for ground contact use |
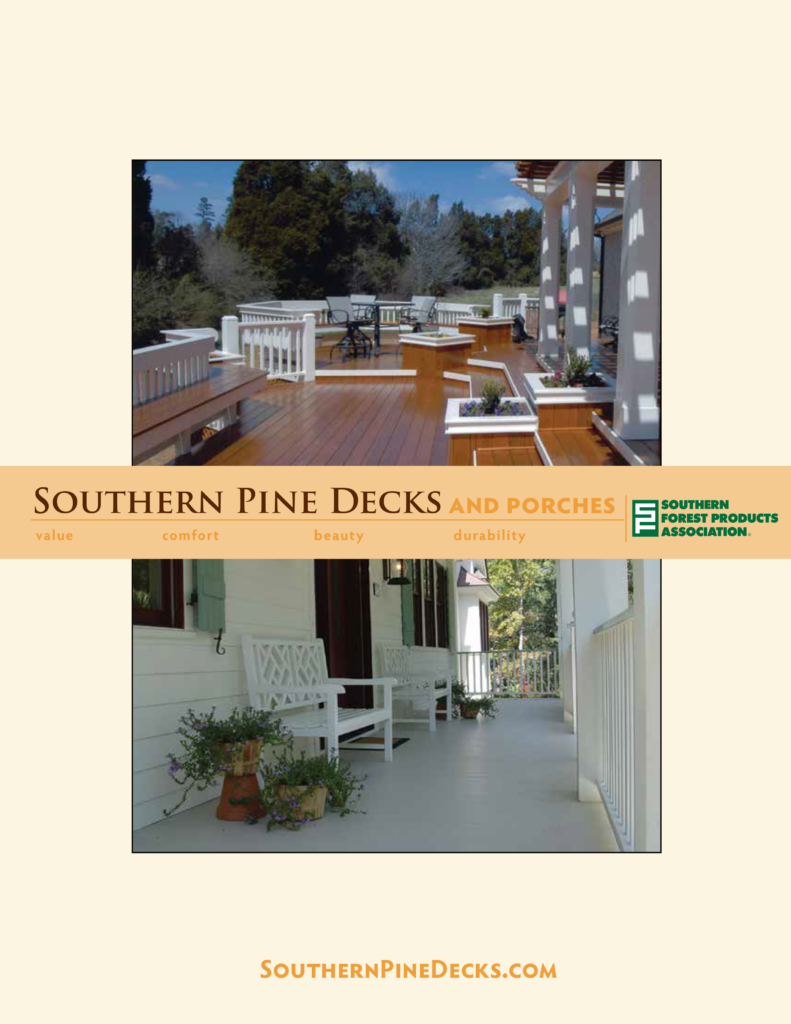
To learn more about proper planning, building a deck, building a porch, and finishing and maintenance, check out our Southern Pine Decks and Porches publication, a comprehensive guide to the specification and construction using pressure-treated Southern Pine.
Click below to learn more about:
The American Wood Council’s Prescriptive Residential Wood Deck Construction Guide, Design for Code Acceptance 6 (DCA6) (available in Spanish) provides code-compliant details for single-level residential wood decks. Decks supporting large, concentrated loads, such as hot tubs, are beyond the scope of this guide. The guide also does not address wind or seismic design issues and does not apply to decks that will experience snow loads, snow drift loads, or sliding snow loads that exceed 40 pounds per square foot.
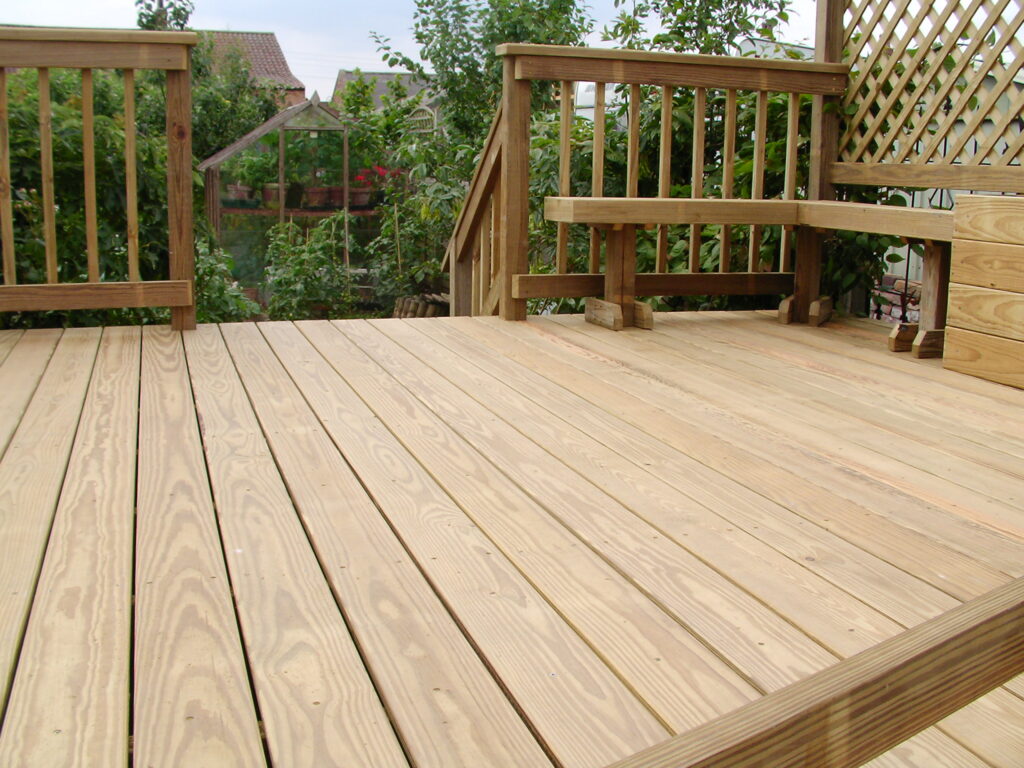
Decking & Stair Treads
Decking boards must endure both foot traffic and weather. When planning your deck surface and stairs, consider the following to keep your decking attractive, durable, and functional.
Installation
Installation
Layout
Layout
Bark Side Up
Bark Side Up
Decking Width
Decking Width
Spans
Spans
Fasteners
Fasteners
Pre-drill Holes
Pre-drill Holes
Joist Bearing
Joist Bearing
Spacing
Spacing
Installation
Decking and stair treads provide the deck’s walking surfaces. Proper planning and installation will provide an attractive and durable deck surface.
Layout
Plan the layout of your deck carefully. Proper planning saves time, money, and labor, and reduces waste. For example, no cuts are required if the width of your deck is designed to match a typical decking board length (e.g.: 8, 10, 12, 14, or 16 feet).
Bark Side Up
For best appearance and performance, place deck boards “bark side up” so visible growth rings at the end of each board form an arc pattern from bottom to top. This will help reduce weathering-related problems, such as splits or cupping.
Decking Width
To avoid cupping and ponding of water on the deck surface, do not use lumber greater than 6 inches in nominal width (5 ½ actual).
Spans
Southern Pine 5/4 radius edge decking (R.E.D.) and 2×6 lumber used for decking are both rated to span up to 24 inches on center when installed perpendicular to the joist system (boards must span across at least three joists). However, many professionals recommend limiting the R.E.D. span to 16 inches on center to reduce board deflection (bounce). When decking is installed diagonally, space joists 16 inches on center for both R.E.D. and 2×6.
Fasteners
Select decking fasteners for optimum holding power and corrosion resistance to ensure durability and appearance. Visit Connections and Deck Fasteners for selection, installation, and durability tips as well as proper nailing patterns.
Pre-Drill Holes
To reduce splitting, especially near board ends, drill a pilot hole about three quarters the diameter of the nail or screw. A good rule of thumb is to pre-drill anytime the fastener will be located within 6 inches from the end of the board.
Joist Bearing
The ends of decking boards should bear over the full joist edge to maximize fastener holding and minimize end splits. Common practice is to abut deck boards over one joist. However, this provides only minimal bearing and a poor detail because the fasteners must be started too close to the butt end and driven into the joist diagonally. This risks end splits (even with pre-drilling) and poor fastener grip. Furthermore, protruding heads of toe-nailed fasteners create an unsightly appearance and potential trip or injury hazard. On projects where abutment is necessary, best practice is to double the joists to give each board end a full 1 1/2″ bearing. Joist doubling should be planned in the deck layout, so the abutment pattern is staggered for strength and appearance.
Spacing
The width of pressure-treated Southern Pine decking may vary because of moisture content, so adjust spacing between boards during installation to compensate for shrinkage as the wood dries. Refer to the recommended spacing table below:
Guards and Stair Rails
All Southern Pine decks greater than 30 inches above grade are required to have a guardrail to protect users. Guard posts must be a minimum of 4×4, and stair guards must include a handrail on at least one side.
The guard (posts, rails, or balusters) should be installed as an independent system, so do not incorporate ground support posts as part of the guard rail system. Guard posts should be properly connected to the rim joist, and the upper ends of railing posts should be covered with caps or cut at an angle to shed water. Coat all cut ends with copper naphthenate.
TIP: To prevent decay, minimize notching, drilling, and cutting with proper layout and planning for all treated lumber projects. End cuts, notches, and borings should be field treated with a coating of copper naphthenate (2% solution) commonly found at local building materials outlets.
While railings must include a baluster system that prevents the passage of a 4-inch sphere, check with local building codes for railing requirements specific to your area.
| Southern Pine | Component | Common Practice | Superior Performance |
| Wood Selection | Balusters | 2×2 | 2×2 |
| Railings and rail caps | 2×2 | 2×2 | |
| Posts | 4X4 | 4X4, 4×6, or 6×6 | |
| Durability | Pressure treated for above-ground use | Pressure treated for above-ground use with built-in water repellant |
Key Takeaways
Before picking your Southern Pine flooring materials, consult a knowledgeable dealer who can describe flooring grades and patterns, as well as provide samples.
Want to learn more about Southern Pine flooring? Check out our Southern Pine Flooring guide by clicking here to read more about:
- Size and patterns
- Water relationship
- Storage and handling
- Jobsite acclimation
- Moisture barriers
- Subfloors over concrete
- Subfloors over wood joists
- Strip flooring
- Plank flooring
- Radiant-heated flooring
- Finishing (sanding, stains, and sealers)